How to Repot an Orchid: A South African Gardener’s Guide
With their delicate blooms and striking presence, orchids have captured the hearts of gardeners and plant lovers around the world. In this comprehensive guide, we look at how to repot an orchid, ensuring your cherished plants not only survive but thrive in their new homes. This article will walk you through the necessary steps to repot your orchid with care and precision.
Understanding when and how to repot an orchid is crucial to the health and longevity of these captivating plants. As we explore this process, we’ll cover everything from the tell-tale signs that it’s time for a new pot to the aftercare that will coax your orchid back into its stunning bloom.
What You Need to Know About Orchids
Orchids, especially the popular Phalaenopsis, are more than just eye-catching additions to your home—they’re a complex and diverse family of plants that require specific care to flourish. In South Africa, orchids have become a symbol of refined beauty in the gardening world, with their unique requirements for light, humidity, and air circulation. Understanding these needs is the first step to successful orchid care.
While figuring out how to plant an orchid might seem daunting, it’s all about replicating the conditions of their natural habitat. Most orchids are epiphytic, meaning they grow on other plants or trees in nature, which is why the right orchid pot is vital to provide ample drainage and air to their roots. If you’re new to orchid care or looking to expand your collection, a visit to Lifestyle Home Garden’s orchid care guide is an excellent place to start for tailored advice to the South African climate.
When to Repot Your Orchid
Repotting an orchid isn’t about following a strict schedule; it’s about observing your plant and responding to its cues. Typically, orchids require repotting every one to two years, but the signs to look out for include overflowing roots, sluggish growth, or deteriorating potting media.
When should you repot an orchid? you might ask. The best time is just after blooming, when the plant is entering a new growth cycle, making it less stressful for the orchid to adjust to its new setting.
However, timing isn’t the only factor. The type of “orchid pot” you choose can also significantly impact the health of your plant. Orchids prefer pots that offer ample drainage and room for roots to breathe. For more detailed guidance, Garden and Home’s article on repotting orchids provides region-specific tips that are invaluable to local gardeners.
How to Repot an Orchid
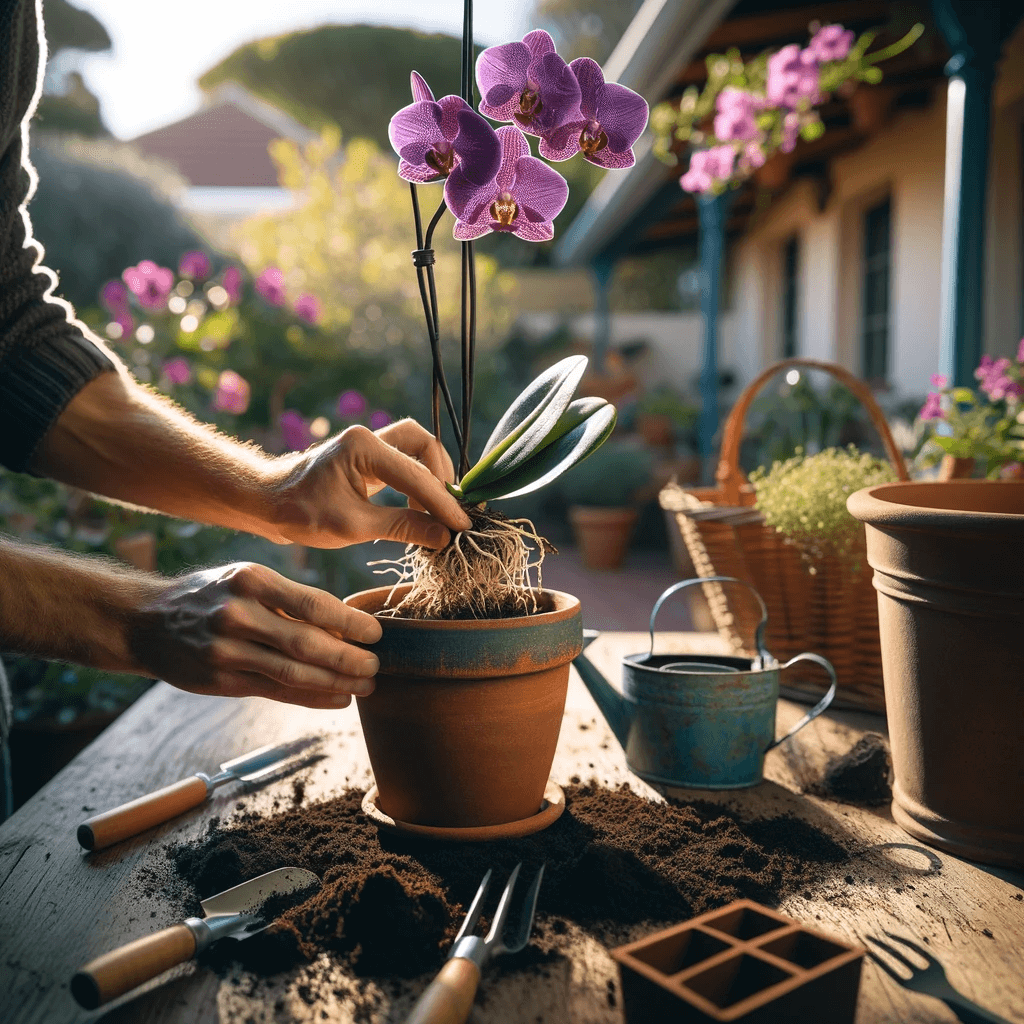
When it comes to “how to repot an indoor orchid”, the process should be meticulous and gentle to avoid damaging the plant’s delicate root system. Begin by carefully removing the orchid from its current container, taking care not to tug or break the roots. Clean away the old potting medium and inspect the roots, trimming away any that are dead or rotting. This step is crucial; healthy roots are the lifeline of your orchid, ensuring it can absorb the nutrients and water it needs to flourish.
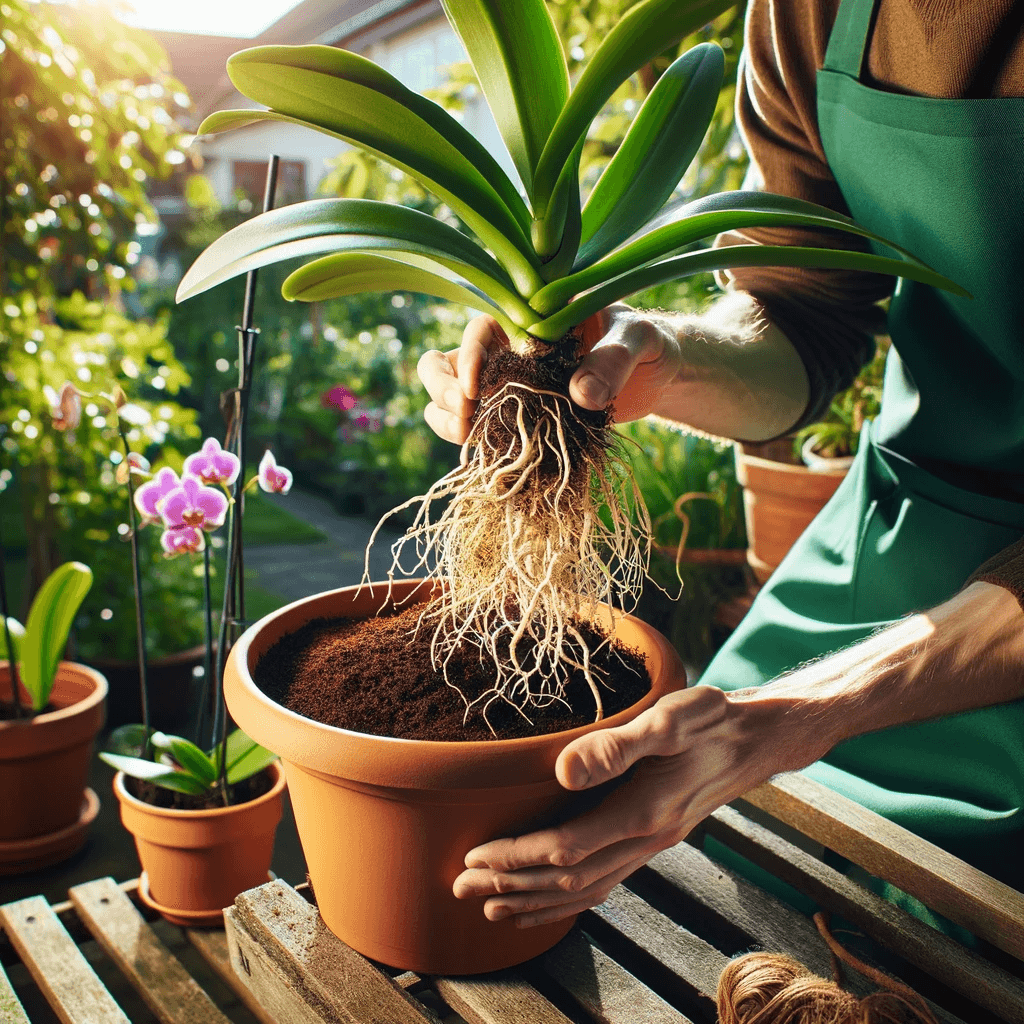
Next, select a potting mix and container suitable for your orchid type. Phalaenopsis, for instance, thrives in a medium that mimics the natural bark they would cling to in the wild. The new pot should be slightly larger than the root ball, allowing for growth, but not so large that the roots cannot dry out between waterings. Builders’ blog offers an excellent resource for choosing the right pot and medium. Follow this with a careful placement of the orchid in the new pot, spreading the roots gently and filling in with the medium, ensuring the base of the plant sits at the correct level.
Step-by-Step Guide to Repotting Your Indoor Orchid
Step 1: Prepare Your Workspace
- Lay out newspaper or a cloth to catch spills.
- Have your new pot, orchid potting mix, and scissors or pruning shears on hand.
Step 2: Gently Remove the Orchid
- Hold the base of the orchid gently and tilt the pot sideways.
- Tap the bottom and sides of the pot to loosen the root ball.
- Ease the orchid out, supporting the plant and roots.
Step 3: Clean the Orchid Roots
- Shake off the old potting mix from the roots.
- Use lukewarm water to rinse away any remaining debris.
- Snip off any brown or mushy roots with sterilized scissors.
Step 4: Prepare the New Pot
- Ensure the pot has drainage holes.
- Place a layer of potting mix at the bottom of the pot.
Step 5: Potting the Orchid
- Hold the orchid in the new pot, centering it.
- Gently spread the roots over the fresh potting mix.
- Add more mix around the roots, keeping the plant stable.
Step 6: Final Touches
- Press the mix down gently around the roots.
- Water the orchid lightly to settle the mix.
- Place the orchid in a shaded area before returning it to its usual spot.
Remember, the process shouldn’t be rushed, and each step should be done with care to avoid any damage to the plant. After repotting, keep an eye on your orchid to ensure it adjusts well to its new home.
Caring for Your Orchid’s Roots
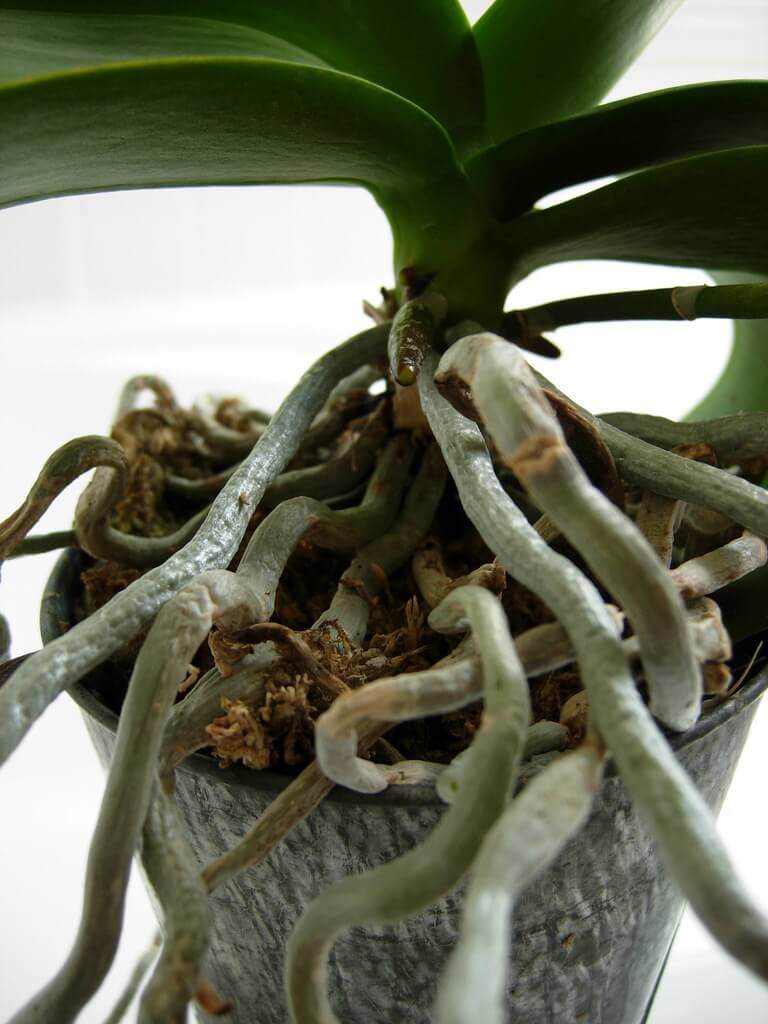
Orchid roots are not just an underground affair; they are integral to the plant’s survival and indicative of its overall health. When repotting, it’s vital to give these roots the attention they deserve. Healthy roots should be firm and a light green or silver color. If you’re pondering, Do you bury air roots when repotting orchids? the answer is no. Air roots are accustomed to exposure and should remain above the soil to breathe. Treat them with care, and if they’ve grown excessively long, you can gently arrange them within the pot without burying them.
Before repotting, What do you soak orchid roots in before repotting? is a question of equal importance. Soaking the roots in lukewarm water for a short period can help to hydrate them and make them more pliable, reducing the chance of breakage when handling. This step is a gentle yet crucial part of the process. For an in-depth understanding, Heckers’ guide on repotting a Cymbidium orchid sheds light on the nuances of dealing with different types of orchid roots.
Aftercare: Ensuring a Healthy Orchid Post-Repotting
Once your orchid is snugly placed in its new pot, aftercare is crucial to help it settle in. Watering should be done with care; Should orchid roots be exposed? is a question that often arises, and the answer is that while the top of the roots can be exposed, they should never be left to dry out completely. After repotting, allow your orchid to rest in a shaded area before returning it to its usual spot to avoid stress from direct sunlight. Should you repot orchids wet or dry? Ideally, the orchid should be dry when repotted to avoid rot, and watering should resume only when the medium is slightly dry to the touch.
In the weeks following repotting, monitor your orchid closely for signs of stress or dehydration. It’s normal for the plant to take some time to adjust, but with proper care, it will soon return to its former glory. Southern Living offers an excellent resource on caring for an orchid post-repotting, which can be an invaluable guide for gardeners looking to ensure their orchids recover swiftly and start growing again.
Managing Aerial Roots
Aerial roots serve as a lifeline for orchids, helping them absorb moisture and nutrients from the air. These roots are quite normal and should not be removed unless they are damaged or dead. What do you do with all the air roots on an orchid? If they’re healthy, leave them be, as they’re vital to the plant’s health. If the aerial roots have become too long or unruly, you can gently guide them back towards the pot, but avoid cutting them unless absolutely necessary.
Why is my orchid growing so many aerial roots? It’s often a sign of good health and a robust growing environment. However, it can also indicate that the orchid needs more humidity or that the potting medium is not adequate. Ensuring the right balance of humidity and monitoring the growth patterns of your orchid can prevent excessive aerial roots. For more on this topic, WikiHow offers a simple, visual guide to managing orchid roots effectively.
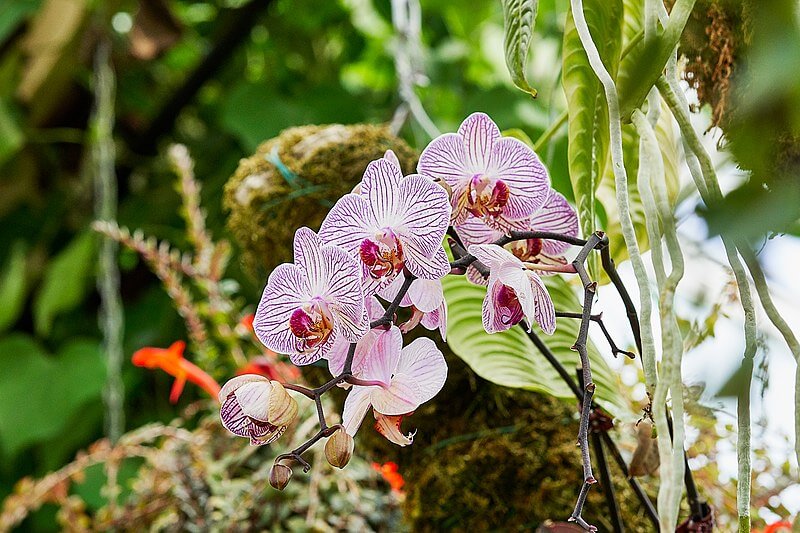
Encouraging Your Orchid to Rebloom
The joy of an orchid’s bloom is unmatched, and encouraging your orchid to rebloom after repotting is the ultimate goal. Patience is key, as it can take time for an orchid to recover from the repotting process. How do I get an orchid to rebloom? involves a few critical factors: proper light, consistent watering, and the right temperature range, especially during the South African winter. It’s also essential to feed your orchid with a balanced fertilizer to promote new growth and blooms. Starke Ayres has a great product for this called Flowering Orchids
Sometimes, all it takes is a slight drop in nighttime temperatures to signal to the orchid that it’s time to bloom. However, avoid drastic changes, as these can stress the plant. Consistent care, observation, and adjusting your care routine as needed can lead to beautiful blooms that are well worth the wait.

How To Take Care of Orchids
Check out Plantinfo’s ultimate guide on how to take care of orchids.
Here is a brief description of it: How To Take Care of Orchids. Discover essential tips on light, temperature, watering, and more to help your orchids thrive. Perfect for beginners and seasoned growers alike, this guide will turn you into an orchid care guru in no time
Top Tip – Repotting Orchids
For the avid South African gardener, here’s a top tip: after repotting your orchid, consider using a cinnamon powder sprinkle on the cut areas of the roots. Cinnamon acts as a natural fungicide and can help prevent infection, a common concern after trimming orchid roots. Additionally, always use sterilized cutting tools when handling orchids to minimize the risk of disease transfer. This small step can significantly enhance the health and recovery speed of your newly repotted orchid.
Another tip is to be mindful of the potting medium’s composition. South African orchids thrive in a mix that offers excellent drainage yet retains some moisture. A combination of pine bark, charcoal, and a bit of Coco peat moss often works wonders. This mix not only simulates their natural growing conditions but also caters to the local climate, which can fluctuate from one region to another.
Orchid Repotting Q&A
Popular questions when repotting and transplanting Orhids:
How do you repot an indoor orchid?
To repot an indoor orchid, start by selecting the right size pot and a suitable orchid-specific potting mix. Gently remove the orchid from its current pot, being mindful not to damage the roots. Remove old potting mix from the roots, trim any dead or decaying parts, and place the orchid in the new pot. Fill in around the roots with the new potting mix, ensuring the orchid is stable but not buried too deeply.
When should you repot an orchid?
Repot your orchid typically every one to two years or when you notice signs like overcrowded roots, a decline in the plant’s health, or degradation of the potting medium. The best time to repot is shortly after the flowering cycle ends and when new growth begins, as the plant is entering a more active growing phase.
How do you replant an orchid without killing it?
Replanting an orchid without harming it involves careful handling and understanding its needs. Gently remove it from its pot, carefully detangle and inspect the roots, and trim away any unhealthy parts. Use a potting medium designed for orchids, and ensure the pot has good drainage. Be gentle when placing the orchid in the new pot and avoid packing the medium too tightly.
Do you bury air roots when repotting orchids?
No, do not bury the air roots when repotting orchids. These roots are adapted to absorb moisture and nutrients from the air and are an essential part of the plant’s respiratory system. They should be left exposed to the air, even after repotting.
What do you soak orchid roots in before repotting?
Before repotting, soak the orchid roots in lukewarm water for a short period, typically 10 to 15 minutes. This hydrates the roots, making them more flexible and less likely to break during repotting. Avoid using cold water as it can shock the plant.
Should orchid roots be exposed?
Yes, orchid roots, especially the aerial ones, can be exposed. These roots are adapted to being above the soil and help the plant to absorb moisture and nutrients from the air. Keeping some roots exposed is natural for orchids and beneficial to their overall health.
Should you repot orchids wet or dry?
It’s best to repot orchids when they are dry. Repotting a wet orchid can lead to root rot, as damp conditions promote the growth of harmful fungi and bacteria. Water the orchid a few days before repotting, allowing it to dry out slightly, which makes the process easier and healthier for the plant.
What do you do with all the air roots on an orchid?
Air roots should be left as they are, providing they are healthy. These roots help the orchid to absorb moisture and nutrients from the environment. If the air roots are excessively long or in the way, you can gently guide them into the new pot, but avoid cutting them off unless they are dead or damaged.
Why is my orchid growing so many aerial roots?
Orchids produce many aerial roots due to their natural growing conditions. It can indicate that the orchid is searching for more moisture or nutrients. Sometimes, it’s simply a sign of a healthy, thriving orchid. Ensure the plant has adequate humidity, light, and proper watering to manage the growth of aerial roots.
How do I get an orchid to rebloom?
To encourage an orchid to rebloom, provide optimal growing conditions with adequate light, humidity, and a consistent watering schedule. After the bloom cycle, reduce watering slightly and maintain a cooler environment at night to stimulate reblooming. Fertilize regularly with an orchid-specific fertilizer, and ensure the plant is not stressed by environmental factors. Patience is key, as it can take time for an orchid to prepare for its next bloom cycle.
Additional Recources for How to Repot an Orchid
- Orchid Care 101 – How to Take Care of Orchids from Plantinfo is a detailed guide to general orchid care, enhancing the repotting advice with broader care tips.
Orchid Care Guide from Lifestyle Home Garden, offering comprehensive care instructions tailored to South African gardeners.
Guide on Lavender, provided by The Gardener, which complements orchid care with additional gardening insights.
How to Repot Orchids, a practical guide from Garden and Home to assist gardeners with the repotting process.
Builders Blog presents a straightforward Repotting Orchids guide, perfect for beginners and experienced gardeners alike.
Heckers offers an in-depth look at How to Repot a Cymbidium, covering one of the many varieties of orchids you might encounter.
Southern Living’s guide on How to Repot an Orchid provides useful tips to ensure your orchids thrive after repotting.
WikiHow’s Repot an Orchid Guide is a visual resource that walks you through each step of the repotting process.