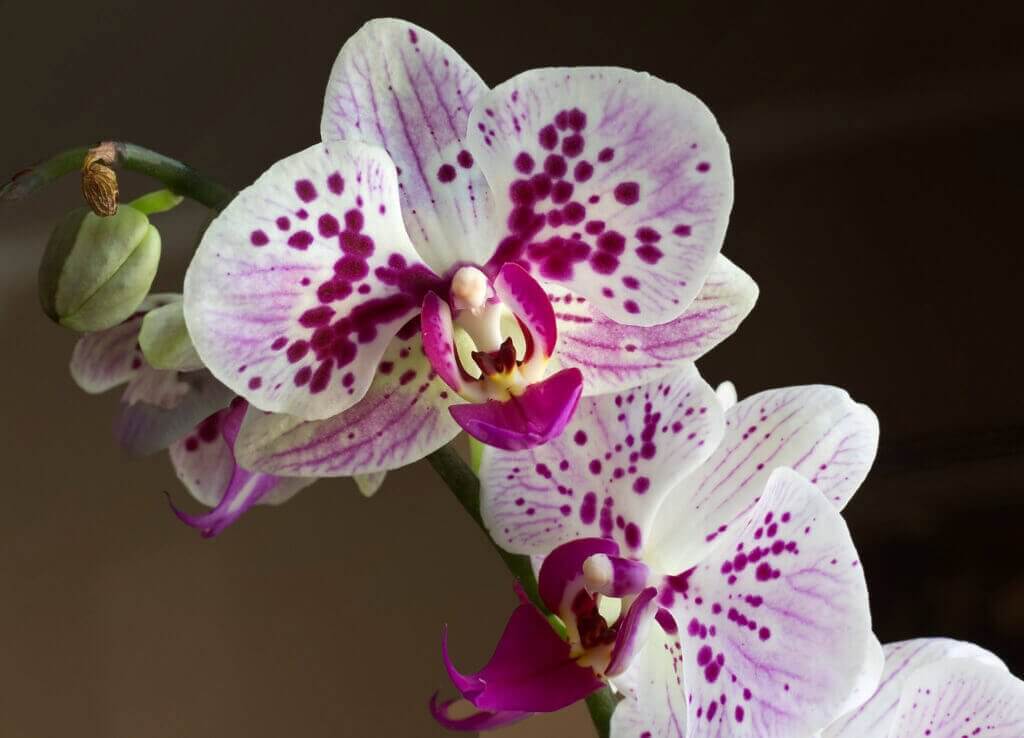
How to care for orchids
From their mesmerizing colors to those oh-so-elegant blooms, orchids are like the divas of the plant world. Whether you’re just starting out or you’ve been chatting to your leafy friends for years, this guide on Orchid Care 101 is going to be your new best friend. So, grab a cup of your favorite drink, get cozy, and let’s unravel the secrets to making your orchids the happiest and prettiest they can be! This detailed guide on orchid care is designed to help you navigate the complexities of nurturing orchids. We will have you be a Orchid care guru in no time.
Orchid Care: General Tips for Thriving Orchids
- Understanding Light Requirements: Orchids thrive in bright, indirect light. Too much direct sunlight can scorch their leaves, while too little can hinder their growth and blooming.
- The Right Temperature Range: Most orchids prefer a temperate climate, enjoying daytime temperatures of about 18-29°C and cooler nights.
- Humidity Needs: Orchids love humidity, aiming for a level between 40-70%. This can be achieved through regular misting or using a humidity tray.
Orchids are not just plants; they are a fascinating world of their own. Understanding their basic needs is crucial for their survival and flourishing. A well-lit room without direct sunlight, a stable temperature, and a humid environment are the cornerstones of orchid care. These conditions mimic their natural tropical habitat, providing the perfect balance for growth and bloom.
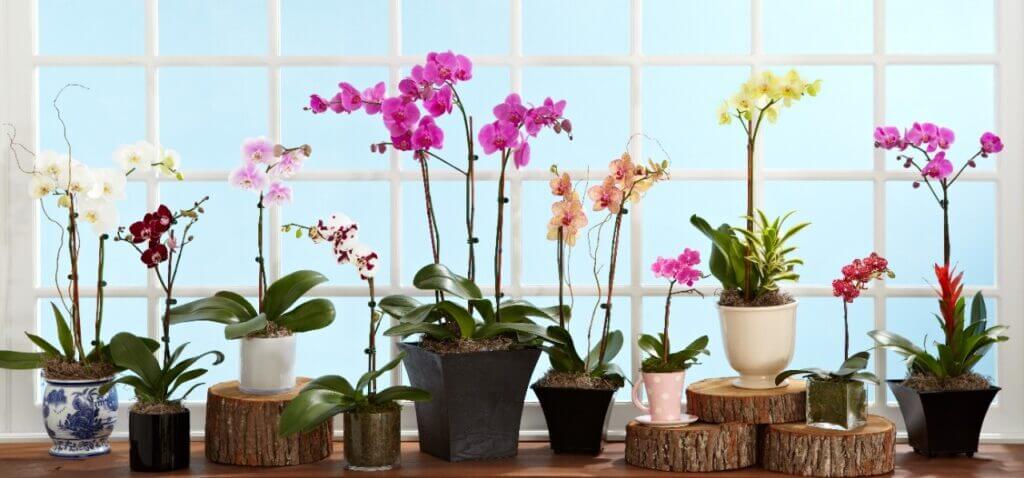
What type is your Orchid?
Understanding Orchids: An Introduction to Orchid Plant Care
Orchids are a fascinating and diverse family of plants, each requiring specific care approaches.
- Diverse Orchid Species: The Orchidaceae family boasts over 25,000 species. From the moth orchid (Phalaenopsis) to the vanilla orchid (Vanilla planifolia), each species has unique care requirements in terms of light, water, and temperature. Knowing the specific needs of your orchid type is vital for providing the right care.
- Adaptability: Orchids have a remarkable ability to adapt to various indoor environments. This adaptability makes them suitable for a range of settings, from cozy living rooms to humid bathrooms, as long as their basic needs are met.
- Resilience: Despite their delicate appearance, orchids are quite hardy. They can withstand occasional care mistakes, making them a good choice for busy or novice plant lovers. However, consistent care is key to long-term Orchid health and blooming.
Understanding the specific type of orchid you have is the first step in providing the right care for it.
Choosing the Right Orchid:
-
- Research: Start by researching different orchid species. There are over 25,000 species of orchids, and each has its own requirements for light, temperature, and care. Popular choices for beginners include Phalaenopsis (Moth Orchids) and Cattleya.
- Match Your Environment: Consider the conditions in your home. Do you have lots of natural light or more shaded areas? What are the typical temperature and humidity levels? Select an orchid that thrives in your specific environment.
- Care Capacity: Be realistic about the time and effort you can dedicate to orchid care. Some species require more attention and specific care routines than others.
Orchid Types: Discovering the Right Variety for You:
- Phalaenopsis Orchids: Known for their long-lasting flowers, these are ideal for beginners.
- Cattleya Orchids: Renowned for their large, fragrant blooms, suitable for more experienced growers.
- Dendrobium Orchids: These orchids are diverse in their care needs and flower forms, offering something for every level of expertise.
The orchid family, Orchidaceae, is vast and diverse, making it one of the most fascinating plant families to explore. Each type of orchid has its unique charm and care requirements. Phalaenopsis, or ‘Moth Orchids,’ are renowned for their ease of care and enduring blooms, making them perfect for beginners. Cattleya orchids, often called the ‘Queen of Orchids,’ require a bit more experience but reward with stunning, fragrant flowers. Dendrobiums offer a wide range of varieties, from easy-care to more challenging species.
Best Orchids for Beginners: Easy-Care Varieties to Start With
- Oncidium Orchids: Often referred to as ‘Dancing Ladies’, these are known for their vibrant, cheerful blooms and tolerance to a range of conditions.
- Miltonia Orchids: Also known as ‘Pansy Orchids’, they are praised for their beautiful, pansy-like flowers and are relatively easy to care for.
- Zygopetalum Orchids: These orchids are known for their strikingly patterned blooms and sweet fragrance, making them a delightful addition for beginners.
Starting your orchid journey is an exciting venture. The key is to begin with a species suited to your care level and environment.
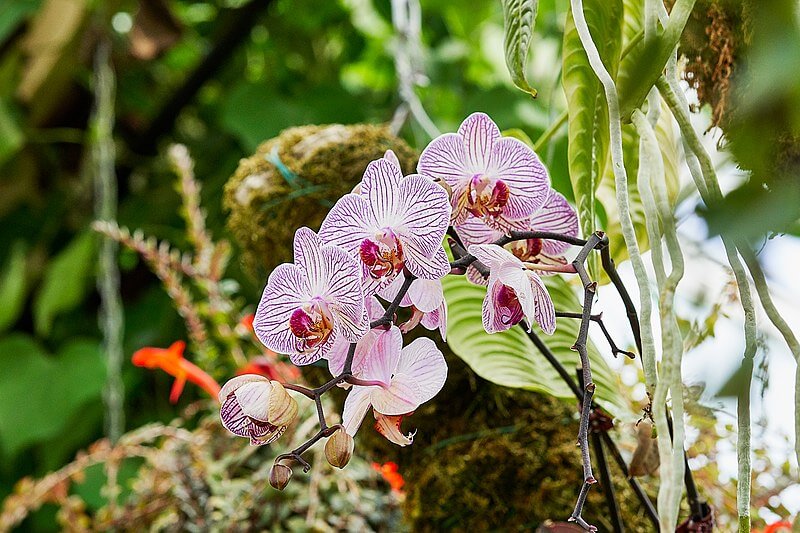
Where to Put Your Orchid:
Finding the right spot with the perfect amount of light and a favourable temperature is crucial for the health and flowering of your orchid.
Optimal Lighting for Orchid Care
How much light does an orchid need?
Light is a critical factor in the health and flowering of orchids.
- Indirect Sunlight: Orchids generally thrive in bright, indirect sunlight. Direct sun exposure, especially during the harsh midday hours, can scorch their leaves, while insufficient light can hinder their growth and blooming. It’s important to find a balance that mimics the dappled light of their natural habitat.
-
Ideal Placement for Orchids in South Africa: The placement of your orchid in a South African home can greatly influence its health and blooming potential. Given the country’s diverse climate, which ranges from Mediterranean in the southwest to temperate in the interior plateau, and subtropical in the northeast, the right location for your orchid can vary.
-
East-Facing Windows: In South Africa, east-facing windows are typically the best choice for orchids. These windows allow for exposure to the gentle morning sun, which is less intense than the afternoon sun. This mild sunlight is ideal for most orchid species, providing them with the light they need without the risk of leaf burn.
-
South-Facing Windows and Sunlight Intensity: South-facing windows in South Africa can also be suitable for orchids, especially in regions with milder sunlight. However, in areas with more intense sun, particularly during the hot summer months, it’s advisable to use sheer curtains or blinds. These can help to filter and soften the sunlight, preventing damage to the delicate leaves of the orchid.
-
Adjusting to Seasons: South Africa’s seasons can also play a role in where you place your orchid. During warmer seasons, you might need to shield your orchid from the harsher sun, while in cooler months, maximizing light exposure can be beneficial.
-
Consider the Microclimate: Each home has its own microclimate. Factors such as altitude, proximity to the coast, and local weather patterns can affect indoor growing conditions. It’s important to observe how your orchid responds to its placement and make adjustments as needed.
-
- Light Monitoring: Regularly monitoring your orchid’s leaves is a good way to gauge if it’s receiving the right amount of light. Leaves that are dark green may indicate too little light, while yellowing or reddish leaves can signal too much direct sunlight.
Perfect Environment For an Orchid
Orchids are sensitive to their surrounding temperature and humidity.
- Temperature Range: Most orchids flourish in a daytime temperature range of 18-24°C and prefer a slight drop in temperature at night. This temperature variation is important for many orchids to trigger blooming. Avoid placing orchids near heat sources or cold drafts, as extreme temperature fluctuations can stress the plant.
- Humidity Levels: Orchids naturally grow in humid environments. In homes with dry air, increasing humidity around the orchid can be beneficial. This can be achieved using a humidity tray filled with water and pebbles or a room humidifier. Ensuring good air circulation is also important to prevent fungal and bacterial growth.
- Environment Control: Creating a stable environment that doesn’t fluctuate dramatically in temperature and humidity is key. Orchids can adapt to less-than-ideal conditions, but sudden changes can be harmful.
Creating and maintaining the right environmental conditions is essential for the health of your orchid.
How to Water an Orchid?
Watering: A Key Aspect of Orchid Plant Care
Correct watering is essential for orchid health.
Orchid Watering Tips: Keeping Your Orchids Hydrated
- Check Before Watering: Overwatering is a common mistake. Always check the moisture level of the potting mix before adding water.
- Watering Technique: Use room temperature water and water thoroughly, allowing excess water to drain away.
- Adjust to Seasons: Reduce watering frequency in winter, as orchids generally require less water during their dormant period.
Watering orchids correctly is crucial for their health. It’s essential to avoid the pitfalls of overwatering, which can lead to root rot. Before watering, assess the moisture of the potting mix – it should be slightly dry to the touch. When you do water, do so thoroughly, ensuring the roots are fully saturated and then allowing any excess water to drain. Remember, the watering needs of your orchid will vary with the seasons, requiring less in the cooler, dormant months.
How to water an Orchid
- Moderation is Key: Orchids prefer their roots to be slightly on the drier side rather than waterlogged. Overwatering is a common mistake that can lead to root rot, which is detrimental to the plant’s health. It’s better to err on the side of under-watering than overwatering.
- Watering Technique: When watering, let the water run freely through the potting medium to ensure thorough hydration. Wait until the medium is almost dry before watering again. This mimics the natural wet-dry cycle orchids experience in their native environments.
- Quality Matters: The quality of water can also affect orchid health. Orchids are sensitive to chemicals often found in tap water. Using rainwater or distilled water can be beneficial, especially in areas with hard tap water.
- Frequency: While the general rule is to water orchids once a week, this can vary. Factors such as the type of orchid, the potting medium, the size of the pot, and the environment (humidity, temperature, airflow) all influence watering needs.
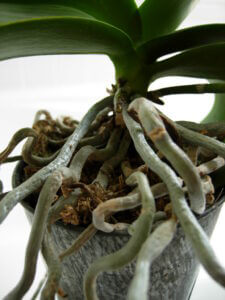
- Signs of Over/Under Watering: Over-watered orchids may have yellowing leaves or a rotten smell at the base, while under-watered orchids have wrinkled leaves and their roots appear silvery-gray instead of green.
Understanding and adapting to your orchid’s watering needs is a crucial aspect of orchid care.
How to Fertilize an Orchid: Fertilizing Your Orchid
Fertilizing your orchid is a critical aspect of its care, influencing both its health and its ability to flower. Here’s a detailed guide on how to fertilize your orchid effectively:
Orchid Fertilizer Choice
- Type: A balanced, water-soluble fertilizer is best suited for orchids. Look for fertilizers that are specifically formulated for orchids, as they contain the ideal balance of nutrients necessary for growth and blooming.
- Fertilize orchids for growth
- These fertilizers typically have a higher nitrogen content. Nitrogen is key for leaf and stem growth.
- Best used during the orchid’s active growing phase, which is generally in the spring and summer.
- Helps in developing a strong vegetative structure, including leaves and roots.
- Promotes healthy, vigorous growth.
- Prepares the orchid for a robust blooming phase by developing a strong foundation.
- Fertilize orchids for flowers
-
Flowering fertilizers often have higher phosphorus content. Phosphorus is essential for flower development and bloom enhancement.
-
Ideal for the pre-blooming and blooming stages, usually in late summer or early fall, depending on the orchid species.
-
Applied as the orchid starts to show signs of producing flower spikes or buds.
-
Encourages and supports the flowering process.
-
Helps in the development of vibrant, long-lasting blooms.
-
Feed Orchids Regularly
- Frequency During Growing Season: Fertilize your orchid often during the active growing season, which is usually in the spring and summer months. This consistent feeding ensures your orchid gets the nutrients it needs without being overwhelmed.
- Strength: Use the fertilizer at a quarter of its recommended strength. This diluted solution is more suitable for the sensitive root system of orchids and prevents nutrient overload. (this is only in the case of fertilizers that are not specifically formulated for feeding Orchids.
- Adjustment in Dormant Period: Reduce the frequency of fertilization when the orchid enters its dormant period, typically in the fall and winter. During this time, a monthly schedule is sufficient.
- Monitoring Plant’s Response: Keep an eye on how your orchid responds to the fertilization regimen. Adjustments might be needed based on the plant’s reaction.
- Indicators of Nutrient Needs: If your orchid shows slow growth or a lack of flowering, it might need more nutrients.
- Signs of Over-Fertilization: Be cautious of over-fertilizing. If the orchid’s leaves become excessively dark green and the plant grows vigorously but doesn’t flower, this could indicate too much fertilizer.
Fertilizing your orchid correctly is vital for promoting healthy growth and vibrant blooms.
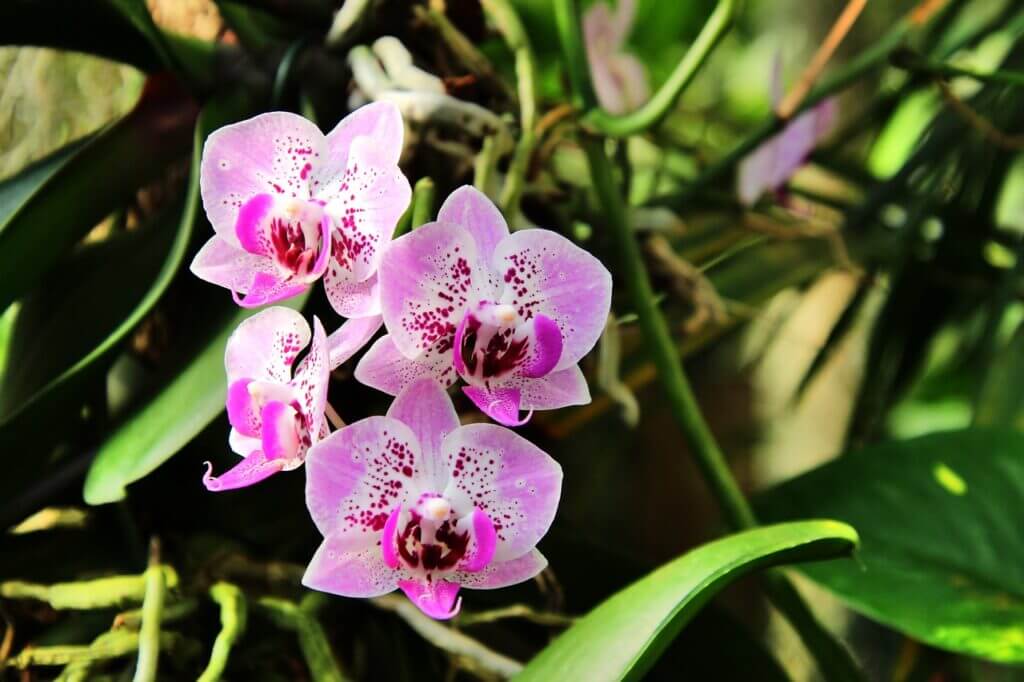
Orchid Flowers and Blooming Tips: Encouraging and Maintaining Beautiful Orchid flowers
Orchid blooming can be influenced by several factors. Adequate light is essential; insufficient light can prevent blooming, while too much can harm the plant. Many orchids also respond well to a slight drop in temperature at night, which mimics their natural environment and can trigger blooming. Additionally, adjusting your fertilization strategy by using a bloom booster can encourage and support robust flowering.
Light is Key: Ensure your orchid receives the right amount of light, critical for bloom initiation.
Temperature Variance: A slight drop in night temperature can stimulate blooming in many orchid varieties.
Proper Fertilization: Use a bloom booster fertilizer or a high-phosphorus formula to encourage flowering.
How to Plant or Repot an Orchid: When and How to Repot Orchids
Repotting an orchid is aimed at ensuring the plant’s health and longevity. By carefully following these steps, you can create an optimal environment for your orchid to thrive, promoting healthy growth and spectacular blooms.
Follow this step by step guide on how to repot or transplant an orchid.
Repotting Orchids: Step-by-Step Guide
Step 1: Knowing When to Repot Orchids
- Timing & Signs: Orchids generally need repotting every 1-2 years. The most obvious sign is the decomposition of the potting medium, or roots growing out of the pot.
- Importance: Timely repotting is crucial for maintaining the health of the orchid. Old or decomposed media can lead to root problems and affect the orchid’s growth. Repotting an orchid can also encourage new growth and flowering.
Step 2: Choosing the Right Potting Mix For Orchids
- Select a Specialized Mix: Opt for a mix specifically designed for orchids, containing elements like bark, perlite, and charcoal.
- Benefits: This mix provides the right balance of drainage and aeration, essential for the unique root system of orchids. It helps in preventing root rot and other common issues.
Step 3: Preparing for Repotting
- Gather Materials: Before starting, make sure you have the new pot, orchid potting mix, and clean pruning tools.
- Preparation: Watering the orchid a day before repotting makes the roots more flexible and easier to handle, reducing the risk of damage during the process.
Step 4: Removing the Orchid
- Gently Remove from Pot: Carefully take the orchid out of its existing pot, trying to keep the root disturbance to a minimum.
- Root Care: Inspect the roots closely. Healthy roots are typically green and firm. Trim away any dead or rotting roots to promote better health.
Step 5: Repotting the Orchid
- Pot Selection: Use a pot that is slightly larger than the previous one and ensure it has good drainage.
- Procedure: Place a layer of the new potting mix in the bottom, then set the orchid in. Add more mix around the roots, filling the pot without overpacking.
Step 6: Aftercare of a Planted Orchid
- Post-Repotting Care: Avoid watering the orchid for about a week to let any disturbed roots heal.
- Optimal Conditions: Place the orchid in a stable, indirect light environment. This helps it to adapt to the new pot and potting mix without the stress of direct sunlight.
Repotting is an important aspect of orchid care, ensuring the health and vitality of the plant. Orchids generally require repotting every couple of years, which can be identified by the breakdown of the potting medium. Selecting the appropriate potting mix is critical as it provides the necessary aeration and drainage. The repotting process should be done with care, ensuring minimal disturbance to the plant’s root system.
Orchid Diseases and Pests: Prevention and Solutions
- Common Orchid Diseases: Look out for signs of root rot, fungal and bacterial infections, which can be prevented with proper watering and air circulation.
- Pest Control: Mealybugs, spider mites, and scale insects are common pests on Orchids. Regular inspections and appropriate treatments like insecticidal soaps can manage these issues.
- Preventive Measures: Maintain good air circulation, avoid overwatering, and keep a clean growing area to prevent most diseases and pests.
Orchids, like all plants, are susceptible to diseases and pests. Early detection and treatment are key. Common issues include root rot, often due to overwatering, and fungal or bacterial infections, which can be mitigated with proper care and environment management. Regularly inspect your orchids for pests like mealybugs or spider mites, and take immediate action if detected. Preventive measures such as good air circulation, appropriate watering, and cleanliness are essential for keeping your orchids healthy.
How to Propagate Orchids: Multiplying Your Orchid Collection
1. Division Method
- Ideal for: Sympodial orchids like Cattleyas, Dendrobiums, and Oncidiums that grow pseudobulbs.
- Best Time: Perform division during repotting, typically every 1-2 years.
- Steps:
- Carefully remove the orchid from its pot and gently clean the roots.
- Identify natural divisions where the plant can be separated, ensuring each division has at least 3 pseudobulbs.
- Use a sterilized knife or scissors to divide the plant.
- Repot each division in fresh orchid potting mix.
2. Baby Orchids/Keiki Growth
- Occurs in: Phalaenopsis and some Dendrobium orchids.
- Steps:
- Wait until the keiki (baby plant) has developed several roots at least a couple of inches long.
- Carefully cut the keiki from the mother plant with a sterilized blade, including a small part of the stem or spike.
- Pot the keiki in a small container with appropriate orchid potting mix.
3. Stem Cuttings
- Suitable for: Orchids like Dendrobiums that have noticeable nodes on their stems.
- Steps:
- Cut a healthy stem with several nodes using a sterilized blade.
- Place the cutting horizontally in a tray with moist sphagnum moss or orchid potting mix.
- Keep the humidity high and wait for new growth to emerge from the nodes.
- Once the new plantlets develop roots, pot them separately.
Additional Tips for Successful Orchid Propagation
- Humidity and Temperature: Maintain high humidity and warm temperatures to encourage growth.
- Patience is Key: Orchid propagation can be a slow process. It may take several months to a year for new plants to establish.
- Aftercare: Provide similar care to the propagated orchids as you would for adult plants, adjusting for their smaller size and root system.
And there you have it, my fellow orchid aficionados! 🌿 We’ve journeyed together through the ups and downs of orchid care, and I hope you’re feeling as exhilarated and ready as I am. Remember, every orchid has its own personality, just like us, and finding out what makes each one tick is part of the fun. So, don’t be afraid to get your hands a little dirty, talk to your plants (they love it, I promise!), and watch as your home transforms with these beauties. Share your orchid stories, triumphs, or even those ‘oops’ moments with me – I’d love to hear them all! Let’s continue to grow together in this vibrant community of orchid lovers. Keep blooming and shining, everyone! 🌺💚