How to Grow Clivias from Seed: A South African Guide
Quick Answer: How to Grow Clivias from Seed
To grow clivias from seed:
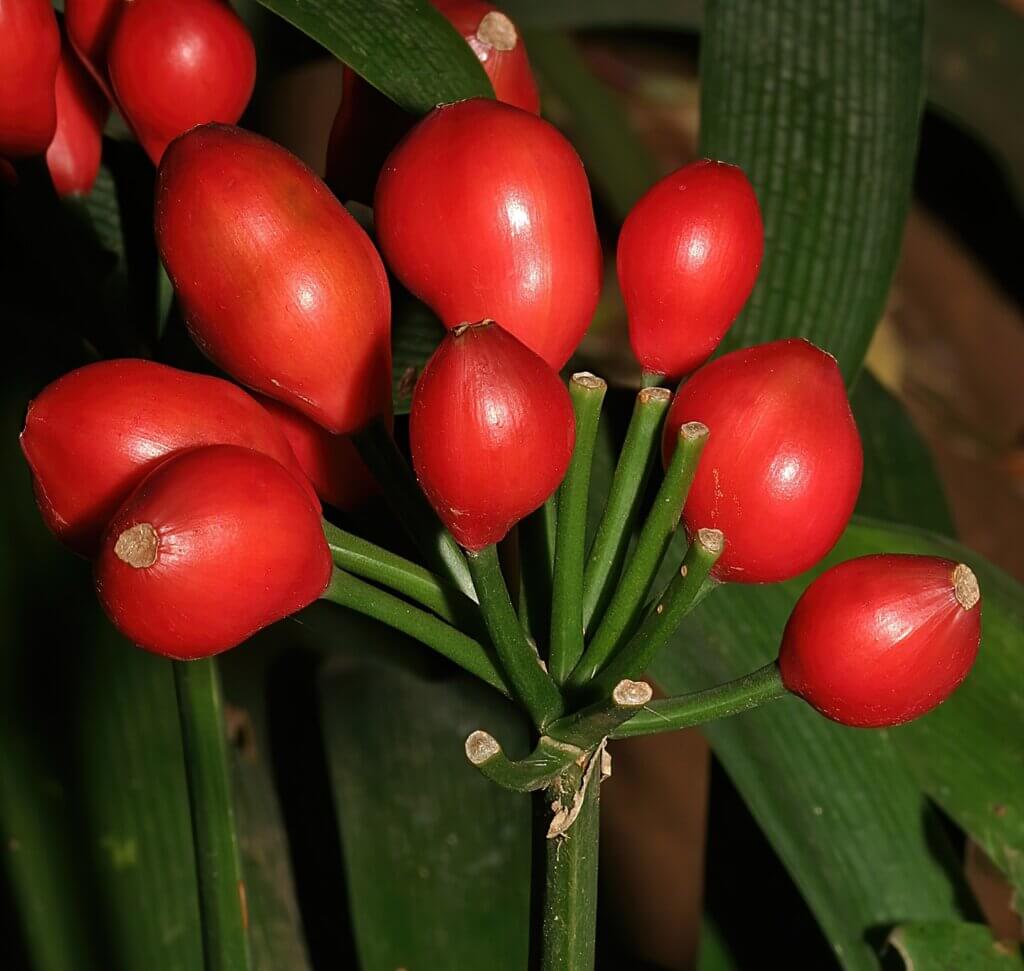
Harvest ripe seeds between April and July when berries turn red or orange.
Clean seeds thoroughly, removing all pulp.
Sow fresh seeds into a light, well-draining mix between April and September.
Keep moist and warm (20–25°C) in bright, indirect light.
Transplant seedlings after six months into individual pots.
Expect flowering in 3 to 5 years.
For a detailed step-by-step guide, keep reading.
Why Grow Clivias from Seed?
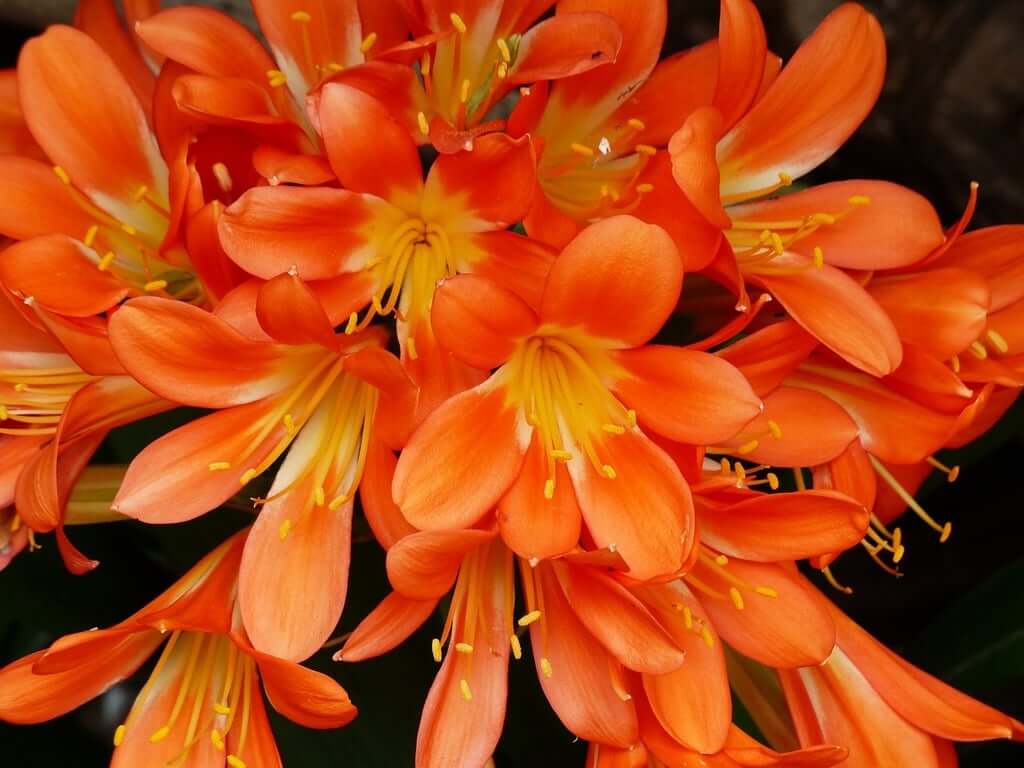
Clivias are prized South African perennials known for their stunning blooms and ability to thrive in shady spots. While mature plants can be expensive, growing clivias from seed offers a budget-friendly and rewarding alternative.
Costs less
Produces unique flower variations
Results in hardier plants adapted to your garden
Supports sustainable, local gardening
Best Time to Grow Clivias from Seed in South Africa
When to Harvest Clivia Seeds
April to July: Collect seeds when berries are plump and brightly coloured.
When to Sow Clivia Seeds
April to September: Sow seeds in autumn or early winter when conditions are cooler and more stable.
Indoor Sowing: Recommended in Gauteng and cooler inland areas.
Outdoor Sowing: Possible in KwaZulu-Natal and other frost-free areas.
Step-by-Step Guide: How to Grow Clivias from Seed
Step 1: How to Collect and Prepare Clivia Seeds
Pick ripe berries that are soft and colourful.
Remove seeds from the fleshy pod.
Wash seeds thoroughly in lukewarm water.
Optional: Soak in a weak fungicide solution for 24 hours.
Step 2: Choosing the Best Soil for Clivia Seeds
Use a light, airy, free-draining mix:
1 part fine bark or coconut coir
1 part perlite or vermiculite
1 part compost or leaf mould
Step 3: Sowing Clivia Seeds
Place seeds just below the surface (0.5–1 cm deep).
Space them 3–5 cm apart.
Keep moist but not soggy.
Step 4: Creating Ideal Germination Conditions
Bright, filtered light (no direct sun).
Warm temperature: 20–25°C.
High humidity: Use a plastic cover or propagation tray.
How to Care for Clivia Seedlings After Germination
ransplant into small pots after seedlings develop two to three leaves.
Keep in light shade, avoiding direct sun.
Water sparingly — allow surface to dry slightly between watering.
Feed lightly after four months with a balanced fertiliser (3:1:5 slow-release).
Repot every 2–3 years — clivias thrive slightly root-bound.
How to Grow Clivias to Maturity From Seed
Watering Routine
Spring/Summer: Water regularly, keeping soil lightly moist.
Autumn/Winter: Reduce watering; allow partial dormancy.
Light Conditions
Prefer dappled or filtered sunlight.
Avoid hot afternoon sun, especially along the coast.
Fertilising Tips
Use balanced slow-release fertiliser during active growing months.
Liquid feed every 4–6 weeks in spring and summer for best growth.
Common Problems and Solutions When Growing Clivias From Seed
As you start growing clivias from seed, you might come across a few typical issues, but the good news is they’re all easy to manage with the right approach. If you notice your seeds are rotting, it’s almost always due to too much water or poor drainage. To avoid this, make sure you’re using a loose, well-draining mix and resist the temptation to keep the soil soggy — damp, not soaked, is what you want.
Sometimes seeds just refuse to germinate, and that’s usually because they’ve lost their viability or they’re not warm enough. Always sow fresh seeds within a week or two of harvesting and keep them snug and warm, ideally between 20 and 25°C, especially in cooler regions.
Yellowing leaves are another common issue, especially if your seedlings are getting too much sun or not enough food. Remember, clivias are shade lovers. Move them into dappled light if they look stressed and start feeding lightly with a balanced fertiliser once they’re a few months old.
If you feel your seedlings are growing too slowly, they’re probably just hungry. From around four months in, a little gentle feeding every few weeks will make a noticeable difference in their growth and strength.
South African Clivia Growing Tips
KwaZulu-Natal and Eastern Cape: Outdoor germination works well; protect from torrential rain.
Gauteng and Free State: Use greenhouses or sunny windowsills for winter sowing.
Western Cape: Avoid waterlogging in winter; use sheltered spots.
Top Local Tip: Clivias thrive best when slightly pot-bound. Do not rush to repot, and expect stronger flowering after two to three years in the same container.
Q and A on How to Grow Clivias From Seed
How long do clivias take to grow from seed?
Clivias are slow growers, and from seed to first flower usually takes around three to five years. In some cases, particularly in cooler regions, it can take even longer. Although it requires patience, the reward is a robust, healthy plant that adapts well to your local environment and offers unique flower colours if grown from hybrids.
How do you germinate clivia seeds?
To germinate clivia seeds, you need fresh, ripe seeds cleaned of all pulp. Sow them in a light, well-draining seed mix and keep them lightly covered with about half a centimetre of soil. Place the container in a warm spot with bright, indirect light and maintain constant moisture without waterlogging. They germinate best at temperatures between 20 and 25°C and should start showing roots within four to eight weeks.
How to grow clivias in South Africa?
Clivias grow best in shady or semi-shaded spots in South African gardens. Sow seeds fresh between April and September, keep seedlings in well-draining soil, and water moderately. As they grow, feed them lightly during active growth in spring and summer. They thrive in most regions, but in colder areas like Gauteng and the Free State, it’s best to keep young plants protected in winter.
Which way up should I plant clivia seeds?
Clivia seeds don’t have a true ‘up’ or ‘down’ side, but it helps to plant them with the root end (the small pointed tip) facing downward if visible. However, clivia seeds are quite forgiving and will generally adjust themselves as they grow, so the orientation is not overly critical.
Is Epsom salt good for clivias?
Yes, Epsom salt can be beneficial in small amounts. It provides magnesium, which helps with leaf health and enhances green colour. You can mix a teaspoon of Epsom salt in five litres of water and use it once every few months, especially during the active growing season. However, avoid overuse, as clivias do not require frequent feeding.
Do clivias like sun or shade?
Clivias are shade-loving plants and prefer bright, indirect light. They thrive under trees or along shaded walls. Morning sun is acceptable, but harsh afternoon sun can scorch the leaves, particularly in warmer regions like KwaZulu-Natal and the Western Cape.
What’s the easiest way to germinate a seed?
The simplest way to germinate a clivia seed is to plant it directly into a moist, well-draining seed mix, lightly cover it with soil, and place it in a warm, bright, sheltered spot. A plastic cover or mini greenhouse setup can help maintain humidity, reducing effort while boosting germination success.
How often should I water clivia seedlings?
Clivia seedlings need moist but not soggy soil. Water them lightly two to three times a week in warm weather, reducing to once a week or less in cooler months. Always check the surface; if it feels dry to the touch, it’s time to water. Overwatering is a common mistake, so be cautious.
Do seeds need sunlight or heat to germinate?
Clivia seeds need warmth more than direct sunlight to germinate. Bright, indirect light is ideal, but maintaining a stable temperature around 20–25°C is the key factor for successful germination. Direct sunlight can overheat or dry out the seeds, so filtered light is best.
What are the 7 steps of seed germination?
The seven general steps of seed germination are:
Seed collection from ripe berries,
Cleaning the seeds to remove pulp,
Pre-soaking (optional) to prevent fungal issues,
Sowing into a light, moist seed mix,
Providing warmth and humidity,
First root and shoot emergence,
Transplanting seedlings after leaf development.
Do seeds need to be covered with soil?
Yes, clivia seeds should be lightly covered with soil, about 0.5 to 1 cm deep. Covering helps maintain moisture and keeps the seed in a stable position. A light cover also protects against pests like birds or insects disturbing the seeds.
Why do we soak seeds for sprouting?
Soaking seeds before sowing can help soften the outer coating and reduce the risk of fungal infections. For clivias, a brief soak in lukewarm water or a weak fungicide solution can speed up germination and improve success rates, especially if the seed pulp has been hard to remove.
Should you put soil on top of seed?
Yes, you should cover clivia seeds with a thin layer of soil. This keeps the seed moist, protected, and encourages healthy root anchoring. A light cover also shields the seed from drying out too quickly.
Can I plant seeds directly into soil?
You can absolutely plant clivia seeds directly into soil, provided it is light, well-draining, and kept consistently moist. Direct sowing is a simple and effective method used by many gardeners, especially in regions with stable, mild autumn temperatures.
Why cover seedlings with plastic?
Covering seedlings with plastic or a propagation lid helps maintain higher humidity and stable temperatures, both of which improve germination rates. It also reduces the frequency of watering. However, remember to air the seedlings daily to prevent mould build-up.
Recommended Resources for Growing Clivias
Conclusion: Is Growing Clivias from Seed Worth It?
Absolutely. While clivias grown from seed take patience, the reward is a thriving, vibrant, shade-loving plant that graces your garden for decades. You gain the satisfaction of watching it grow from a seedling to a flowering masterpiece, perfectly adapted to your local conditions.
